This past Spring my husband built me a greenhouse from recycled windows and wood. So far it's been amazing. I'm very happy that we kept it small as it is easier to heat in the Winter. Not to mention to maintain and clean. It's a 8' x 8' x 8' lean to, which in itself has provided many benefits.
When designing a greenhouse, heating and cooling of the space and providing good ventilation are crucial. I spent a lot of time trying to figure out the best and cheapest way to heat a greenhouse.
We positioned it south / east and the house blocks the hot Summer west sun at the end of the day, helping it not overheat.
Several design decisions have helped with saving heating costs. Our house exterior wall is brick so there is no worry of rotting siding or other damage to the house. It also retains a little heat as the sun shines on it during the day and it's one less exposed wall that looses heat during winter. Inside the greenhouse is a window that connects to the laundry room. In Summer we can raise it and insert a window fan when the greenhouse gets too hot and in Winter open it during the day to let the heat into the house. A stagnant locked up space will cause your plants to burn up or mildew in the Summer and Fall high humidity.
On the greenhouse itself, we installed 2 windows and a door that can be opened for air flow. During the hottest of Summer months, we have an electric computer fan mounted up near the roof that I plug in when the temperature starts climbing. It moves just enough air to not burn up my plants on 100 degree days. I also have a table fan that I turn on for a few hours each day year round.
To heat the space, initially I tried a 1200 watt heater fan that we had on hand and it did little to keep the temperature up during the coldest part of the night. I immediately gave up on using it at all. Several other small greenhouse owners recommended a smaller heater that used only 200 watts. It put out just as much heat using a lot less energy to run compared to my 1200 watt heater. It is my initial "cheap" blast of heat as the sun sets in Winter months. It provides enough heat in the Fall until very late in the morning. At that time another stronger heat source needs to run in tandem to keep the heat up around 50 degrees.
My secondary and main heat source is a portable electric oil heater that I had on hand. It has 2 settings, so far I've only needed the 600W setting but I can add another 900W if temps drop below 20 degrees. Last night was the coldest night yet, getting down to 23 degrees and I kept my greenhouse a cozy 47 inside. My set up keeps it typically 20 degrees higher than the outdoor temperature. Because it was going to be so cold, I did hang an old wool blanket over part of the front windows and a temporary strip of bubble wrap over 1/2 of the side windows where my sensitive plants are located.
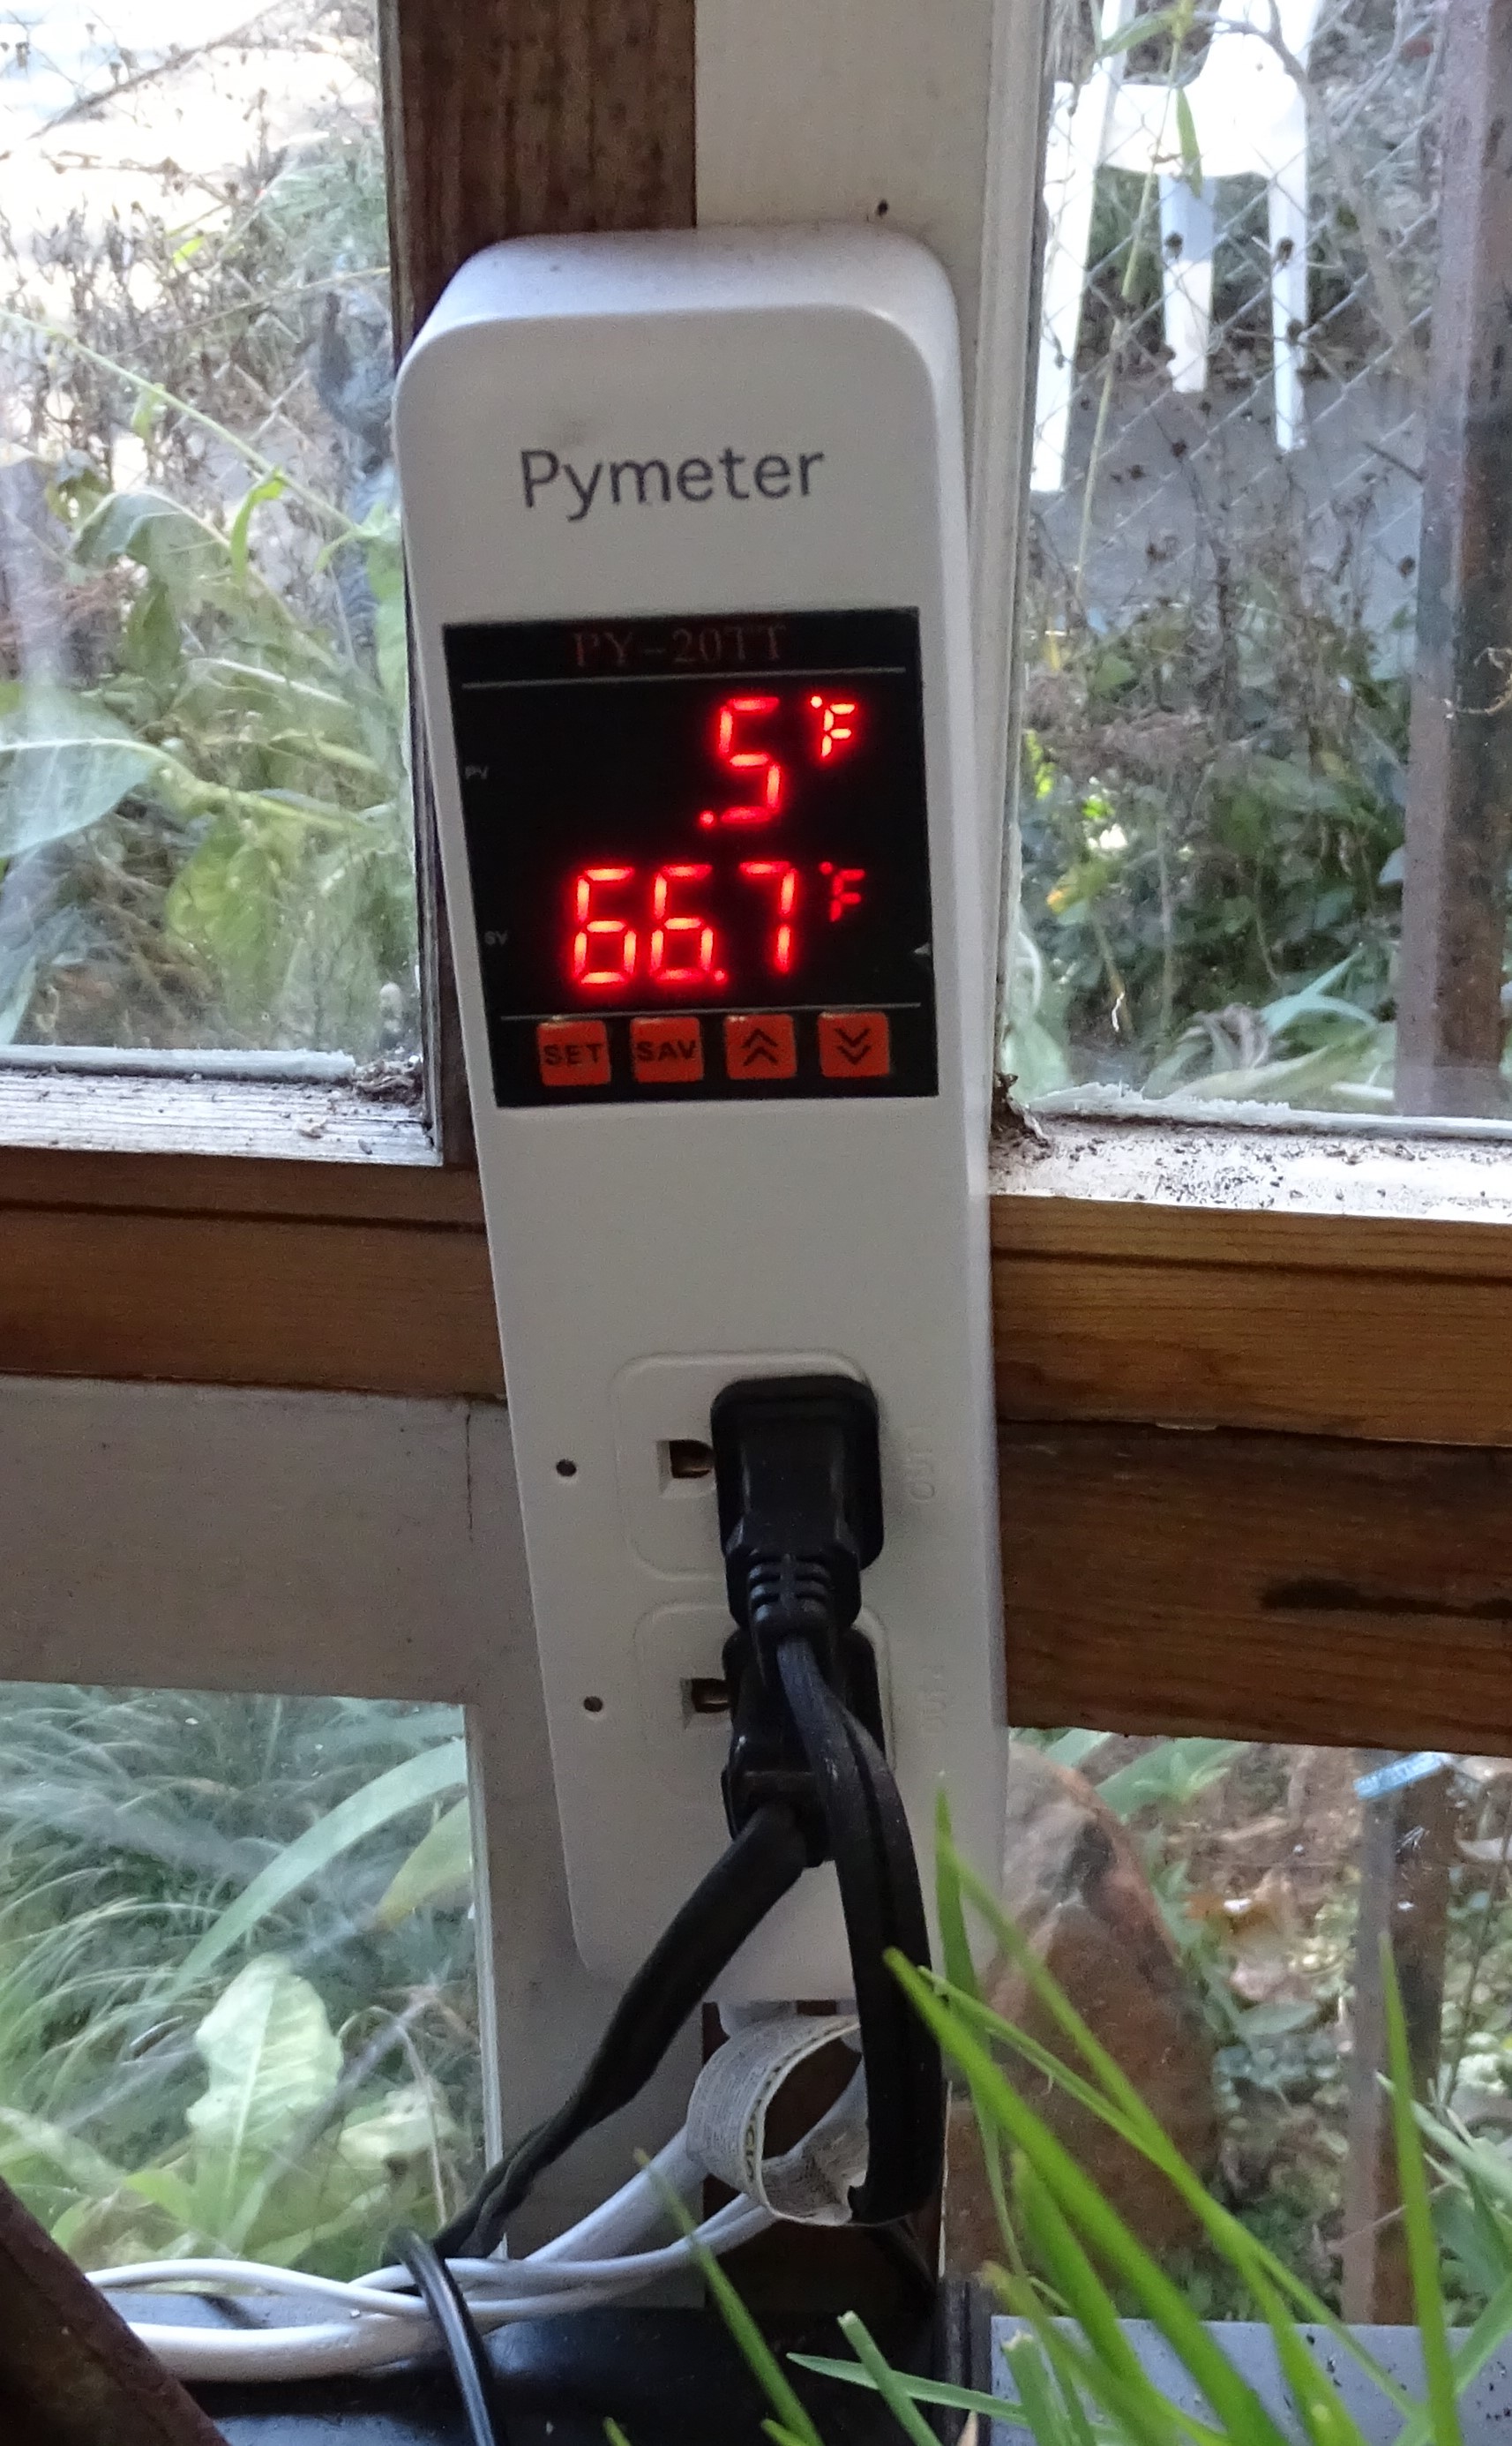
A must have is an automatic temperature driven dual outlet plug. I have both heaters plugged into this device so during the night when the temperature drops the units operate separately and come on at different temperature levels. It's a way to save $ and not just manually turn on units as night approaches and run all night. They turn off and on at temperatures that I have set. It also displays the current greenhouse temperature. It has worked magically.
When you build your greenhouse, keep in mind that any sort of crack or draft is going to be really hard to keep heated unless you don't care how much money you toss at it. A lot of people suggest insulating with greenhouse grade bubble wrap. I have used stiff removable packing bubble wrap sparingly so far because my cucumbers are still coming on (I do not want to block the light during the day). I might eventually need to lower the roof area closer to plants with bubble wrap as January nears when I expect the cucs will stop producing. It would help save heating costs and keep plants cozier.
~Rebecca

.JPG)

.JPG)


.JPG)
No comments:
Post a Comment